skip to main |
skip to sidebar
 Over the past few weeks, I've been doing a lot of wintertime camping in my little micro camper, during my weekend snowboarding trips up to Sunrise Park in Greer, Arizona. In that time, I've learned a lot- and as a result, I've made quite a few changes (big, and small) to the camper, while putting another 1,536 miles on the little guy.
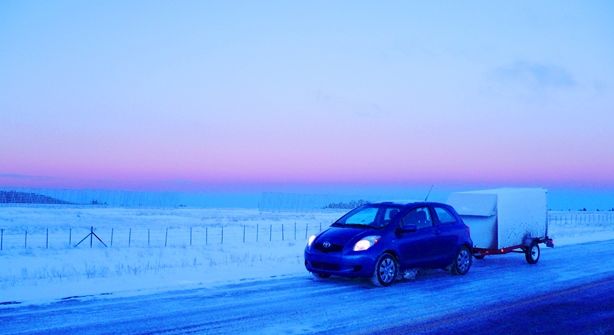 The first thing that I should note, is that the little camper pulls straight as an arrow in all sorts of atrocious driving conditions- much against the predictions of my friends and family, who thought that it would be adversely (and severely) affected by crosswinds. Of course, on my way to and from Sunrise Park, I routinely have to drive across AZ 273... a stretch of road that's notorious for it's strong and persistent crosswinds (and, as you can see, road ice as well).
The trailer simply does not deviate from the straight and narrow, ever, under any circumstance. A pleasant surprise, indeed. Let's hope that trend stays permanent.
 Typical road conditions on AZ 273, on the way to Sunrise Park Resort. Awful road conditions- but, a wonderful photo-op...!
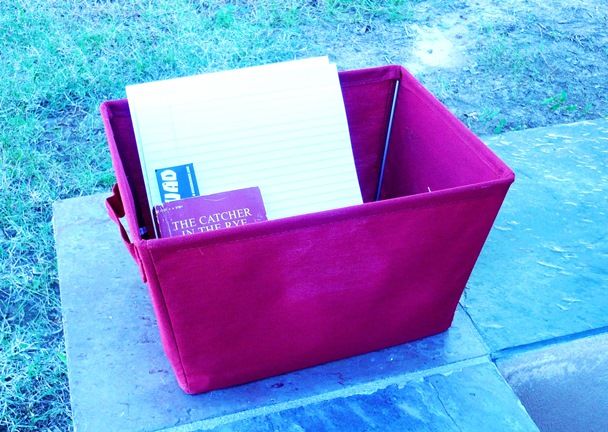 I bought this canvas tray at Wal-Mart last week for about $5, to hold all of the loose stuff that normally sits on my headboard when I'm camping- but, that can turn into loose projectiles when the camper is in motion. Namely: candles, lighters, pens, notepads, books, small lanterns, etc. With the tote, I can put everything away each morning, and still have it in easy reach every evening. Not too shabby...!
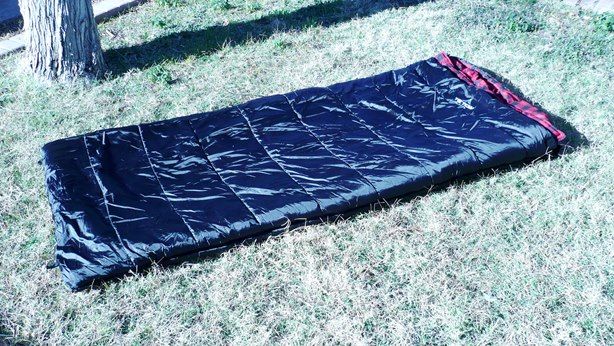 The next purchase was a new Teton 0-degree, XXL sleeping bag from Dick's Sporting Goods (online). The polyester fabric doesn't hold moisture like my old 20-degree Field and Stream bag does, which is important in a camper that's been woefully prone to condensation. The Teton bag works, and works great, all the way down to true-zero-degree temperatures. Yet, it's also very soft, comfortable, and roomy.
I sleep much more soundly now, that I have this beast of a sleeping bag.
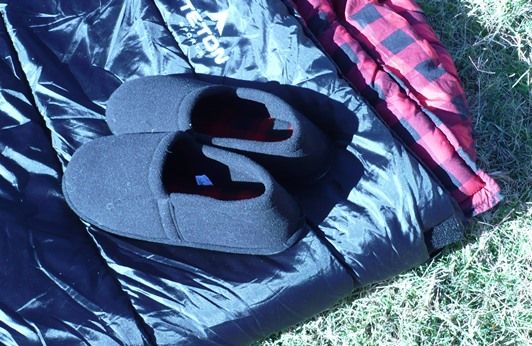 While I was at it, I also bought some matching slippers at Wal-Mart for under $7- a real bargain! The insoles of the slippers even match the sleeping bag, which is an extra bonus...! But really, appearances aside, they're a lifesaver on those super-cold nights when wool socks just aren't quite toasty enough to keep your feet warm. Although form does follow function, it's nice that I can find stuff that have plenty of both- and even better, everything matches everything else.
 The next big installations were done on Christmas Day, and admittedly, were a little overdue. The first was the installation of a roof vent in the camper- which, hopefully, will nullify the persistent condensation/ventilation shortcomings of this particular camper. The vent has a screw-jack opening mechanism, a weather seal, and an inner screen (for bug control in the summertime), and cost me $68 at Camping World over in Avondale, Arizona.
The installation was simple and straightforward: rough out a square opening in the roof (about 13.75" square), drill some #10 holes in the vent flashing (shown above) for the wood screws; lay down a bead of silicone around the perimeter; fit the vent into the roof; and, screw 'er down snug...! Very easy, very simple, and only took about an hour, of which 3/4 of that time was spent sluffing off and drinking cold Cokes. A small price to pay to stay dry and comfortable, I do say.
 The skylight also adds some much-needed natural light to the camper interior. I'll finish the paint-and-trim within the next few weeks...
 The other long-overdue addition was the installation of a pair of gas springs to the rear door, to make opening it (from the inside, at least) much easier, while also giving it some more convenient supporting arms when it's in the open position. Once again: the reason for the upward-hinging door was to provide some sun/rain/snow protection when I'm getting in and out of the camper. In short: it doubles as an awning when it's open- something that "normal", side-mounted doors could never do on their own.
Previously, the rear door was manually opened from the inside (using my shoulders, and a whole lotta effort), and then propped open with a pair of long sticks... which worked fine, as far as they went. But, they did end up proving themselves to be a bit of a pain in the ass... more than I thought they'd be. And opening that large, heavy door from the confined inside of the trailer also proved much more difficult than I'd originally imagined.
The gas springs were about $34 for the pair at AutoZone, and the installation hardware might have been another $10 or so...? The springs took a few hours of trial-and-error to install- but boy, were they worth it...! Now, the door opens itself with the slightest of nudges from the inside, in a smooth and controlled manner. Very cool, very boss...!
 The biggest trial-and-error problem was, where to mount each end, so that the door would use the entire travel length of the gas springs, without running out of length before the door completely closed. And of course, like most teenagers, I didn't exactly pay the best of attention in my high-school trigonometry classes, either.
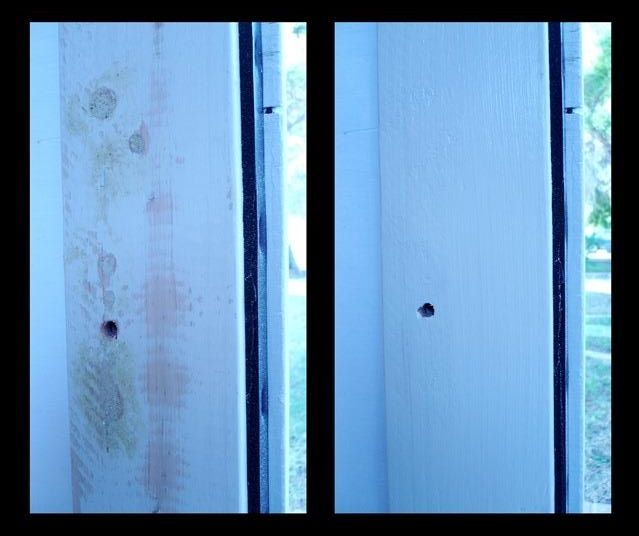
The end result was several "Oops!" holes in my 2x4 rear supports, as I tried to find the ideal positioning for the springs. The answer was some quick "wood spackle"- which is a combination of sawdust, and wood glue, that is pressed into the "Oops!" holes, left to dry- then sanded smooth, and painted over. As you can see, once they're painted, the old holes are impossible to detect...! Try learning that trick in a high-school math class, kids...!
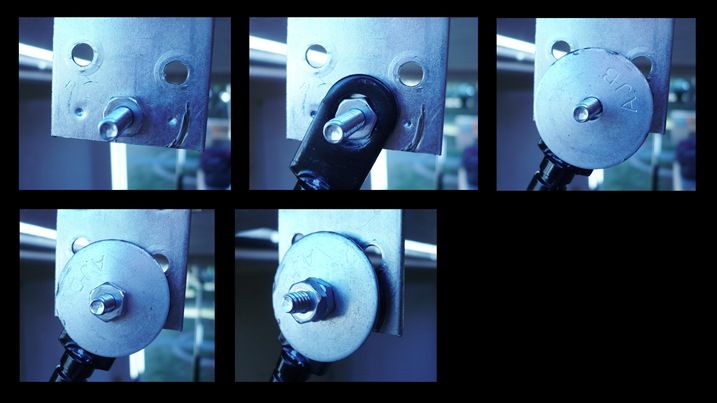 The gas springs have 3/8" mounting holes on either end- whereas the angle brackets could only accommodate a #10 screw. This left a lot of "slop" in my system, until I realized that I could just use a 3/8" nut as a spacer...! Problem solved...! Once I got the nut on, and the spring over it, I used a fender washer to keep them secure, and used two more 3/8" nuts to lock it all into place.
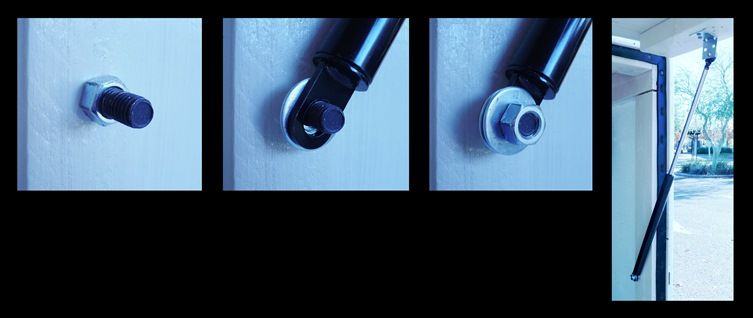 On the bottom end, I used a lag bolt/machine bolt combo to secure the gas spring to the 2x4 upright. Once again, I used a nut as a spacer, a washer on either side of the spring for smooth pivoting, and another nut to secure it all together. The last photo shows the entire assembly in the trailer.
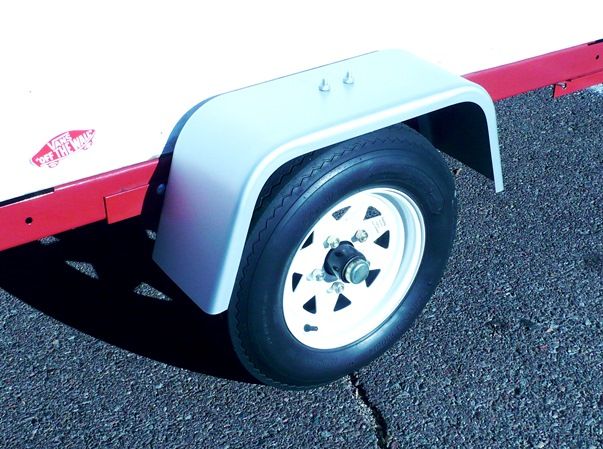 Another Christmas Day addition was a nifty pair of "jeep" style fenders that I bought at Century Wheel & Rim here in Phoenix for about $68 (for the pair). Four drilled holes later (two on each fender), and a quick spray with a coat of aluminum Rustoleum, and voila...! These fenders are much deeper than the stock Harbor Freight fenders, so hopefully they'll cut down on the road-crud a little bit.
 The finished product...! We're gettin' there...!
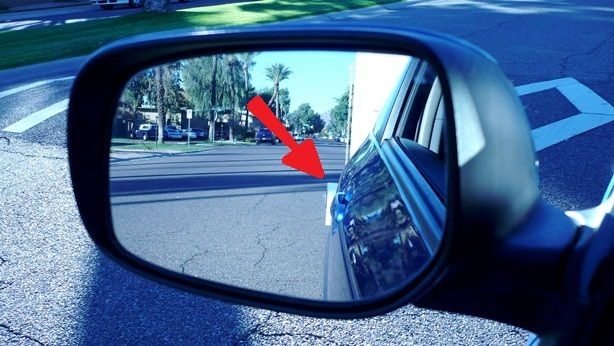 One of the unintended bonuses of the deeper fenders, is that the trailer is now much easier to back into tight spaces. The fenders show up quite prominently in the rearview mirrors; when you see this in both side mirrors, you know that you're backing up in a straight line. A very handy visual queue when you're trying to back smartly and neatly into tight spaces, without looking like a total noob.
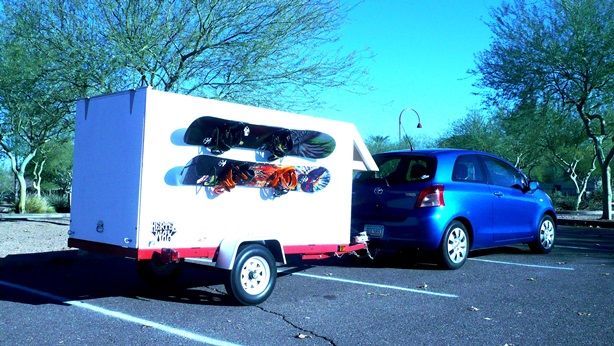 A lot of folks have openly asked me what the prominent brackets are for on the passenger side of the camper shell. The answer: they're for hanging wet, snow-and-ice caked snowboards out to dry, before stowing them away inside. Otherwise, they'd be dripping snow and water all over my mattress and sleeping bags, which would not be cool at all. They can also be locked to the outside, deterring would-be thieves.
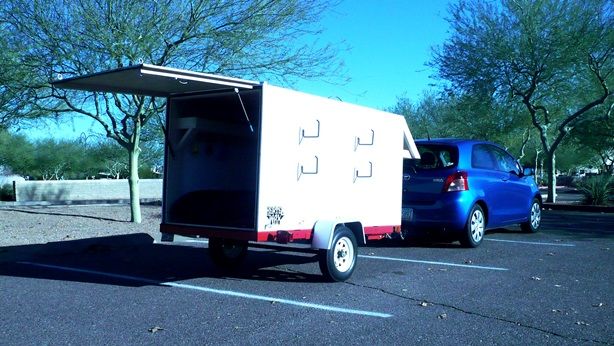
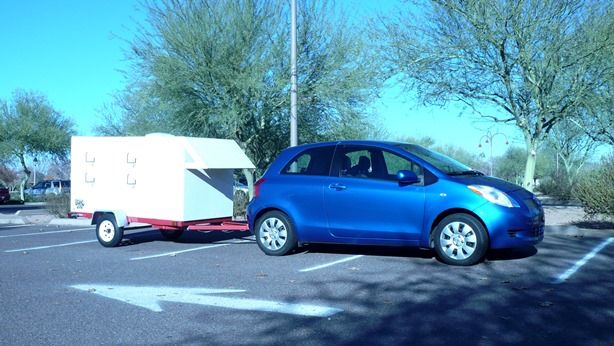
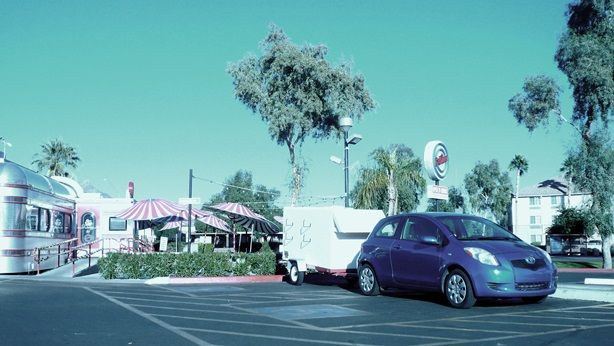 The finished (amended) camper at the "5 and Diner" on Phoenix's northeast side. Next up: a few more weekend trips, and a revision to the nose of the trailer to make it more aerodynamic, while also adding a dozen (or so) cubic feet of additional storage space. Then, in February, it's my month-long pilgrimage to Mt. Bohemia in Michigan's Upper Peninsula, where we'll really be putting the camper to the test...!
See ya on the road...!
______________________________________
Recent Stats:
Average mpg: 29.06 @ 55mph (up from 26.86 @ 65 mph)
Miles traveled (as of December 22nd): 2000.9
TCI ("Total Cost Involved" - including recent purchases, and returns): $1960.76

 This week, I made a few small changes to the camper- mostly, to the interior. Having spent two nights in it this past weekend (Friday and Saturday nights, up at Sunrise Park Resort), I decided that "Job One" for this week was to make it feel a little more "home-y"; warmer, more inviting, and more comfortable...
 The first task was to add some more lighting to the camper. That one was so immediate, that I actually did this while I was on the road this weekend. A quick stop at the Show Low, AZ Wal-Mart netted me this very large, and very bright Ozark Trail lantern for a measly ten bucks. It uses four "D" batteries, which I already had in the kit (they previously powered the air pump for my inflatable mattress)- and it really did brighten the interior quite a bit.
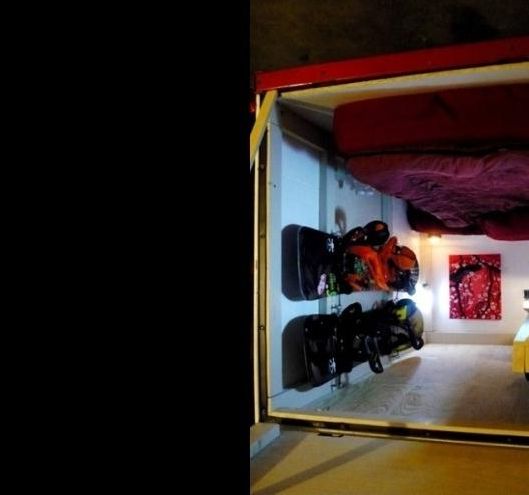 The next two purchases were a little bit more "cosmetic" and "atmospheric" in nature... not entirely functional, but definitely nice additions nonetheless. The first was a collection of three-wick, scented candles from Wal-Mart, in a variety of scents (examples being Apple Pumpkin, Pumpkin Spice, Milled Cider, Fresh Cotton, Natural Vanilla, among others). These were only $3.00 a piece (a real bargain), for a total of about twenty-four bucks total- but, they are a pleasant departure from the "Trench Foot" and "Snowboarder Stank" that usually permeates the interior atmosphere, while also adding a little bit of useful heat to the interior as well.
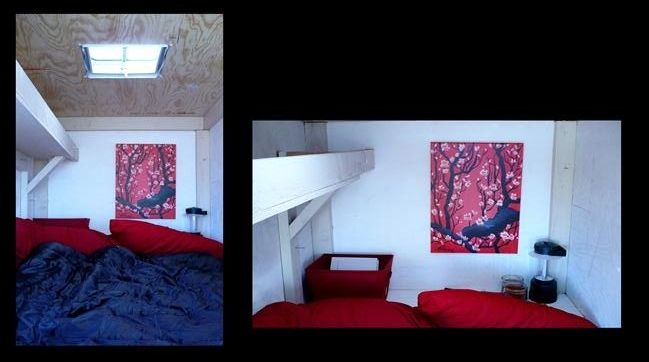
In addition to the candles, I also bought a very spiffy, very boss original painting from our roommate Alyse. Between the candles and the painting, it's starting to look less like a coffin on wheels, and much more like an inviting, restful space.
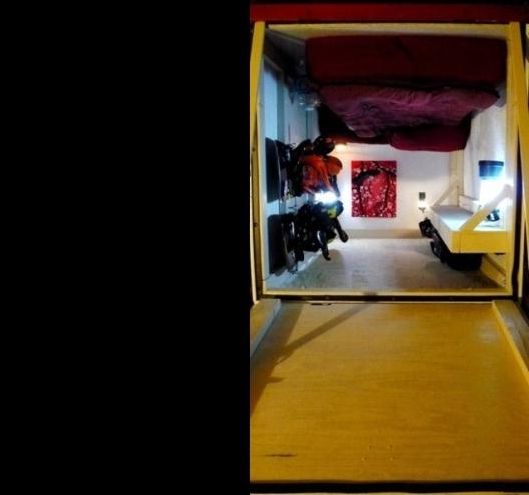 The hinge-up door is still in effect, although it is a little bit heavy, and sometimes a real pain in the butt... but having a handy canopy/sun shade is proving to be a really nice feature.
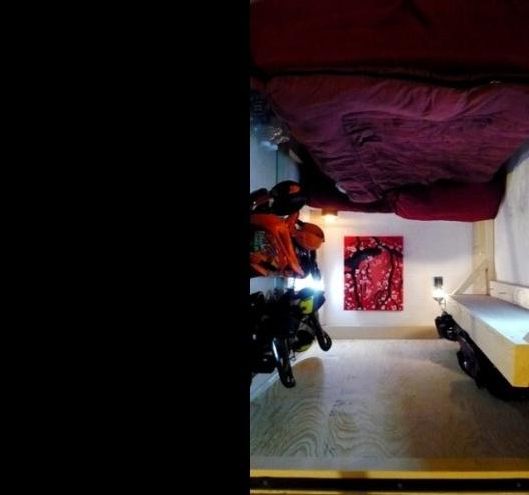 Getting a closer look inside, you can see that there's enough room beside the mattress for water bottles, the rear door poles (that hold up the canopy), extra batteries, books... anything that you might want within easy and quick reach in the middle of the night...
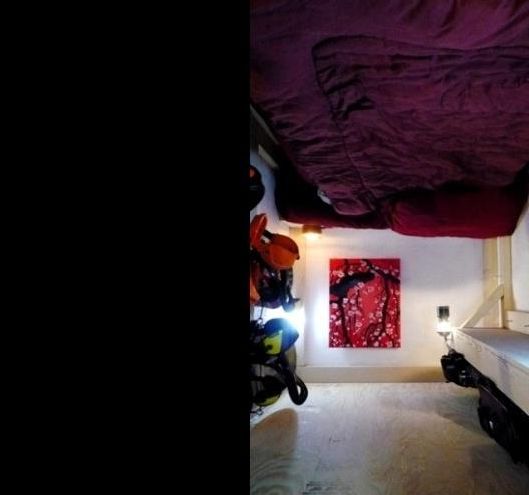 Getting in even closer, you can just barely make out the headboard/storage space in front of the pillows, which is proving very handy for safe keeping of books, eyeglasses, notepads, pens, or whatever else you might want to keep on hand for nightly entertainment. When I have the camper at the house (usually because I'm working on it), the camper also doubles as a nice, quiet, and comfortable reading and hangout space.
Micro campers: They're not just for micro-camping anymore...!

 I've been promising a full pictorial journal of the camper build for a week or so... finally, here it is...! But before I begin the pictorial, I'd like to say one thing. And that one thing is, "It's easier than it looks. Really...!" The beauty behind the design of this camper is that it really requires the very minimum of woodworking skills, and the only tolls you'll need are a circular saw, a tape measure, a straight edge, a pencil, a drill, a 1/8" drill bit, two 9/16" combination wrenches, and a #2 Phillips bit. And later, a paint brush and paint. If you had to go buy all of these tools brand-new, you'd still be hard-pressed to spend more than $100 on everything, and more than 12 hours (or so) actually building this. That said, here's the tutorial...!
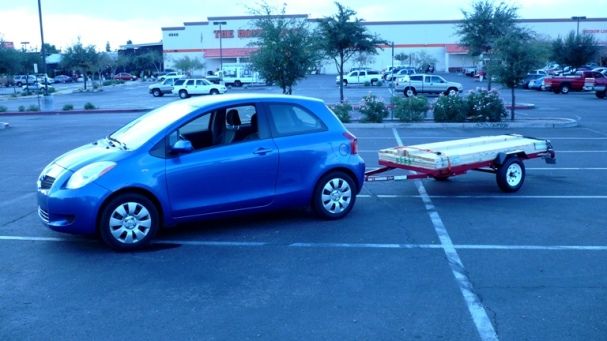 Here's the wood, on my brand-new Harbor Freight flatbed. The trailer weighs a mere 300 lbs, empty; with the wood, it probably weighed about 700-800 lbs. It still felt very much like it was pulling nothing at all behind the car... a good omen.
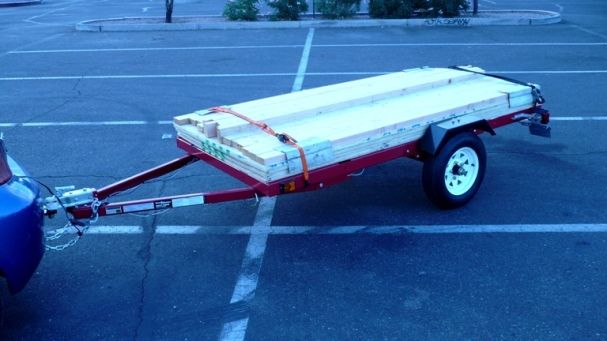 If my memory serves me correctly (and it never really does, but oh well), what we have here are (7) sheets of 5/8" BC plywood, and (17) fir 2 x 4's... not pine, because pine cracks and warps sooooo bad, but fir stays straighter, is a little more dense, and thus, is stronger- even if it is a little heavier, as a result. The wood cost, then, was about $282. But there's some hardware inside the Yaris that brought my bill to around $360 or so.
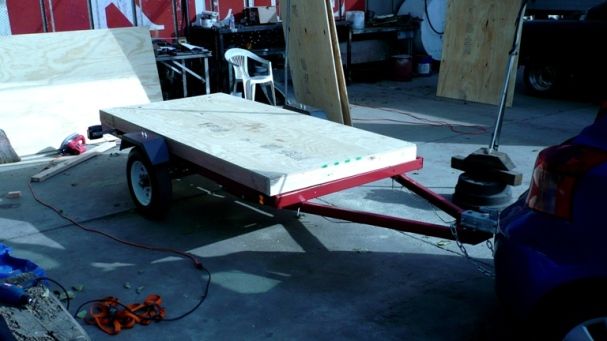 I built the floor first, upside-down, so that it'd be easy to screw the floor to the 2 x 4 perimeter frame. It's a full 4' x 8' sheet, with 5/8" trimmed off of the sides, and off of the rear; this accommodates the walls, and the rear door, while ensuring that the overall size of the box will be 96 5/8" long, 48 5/8" tall, and 48" wide... so it sits perfectly on the bed of the trailer, with minimal overhang (the only overhang being 5/8" off of the nose). It also ensures minimal cutting, and maximum interior space.
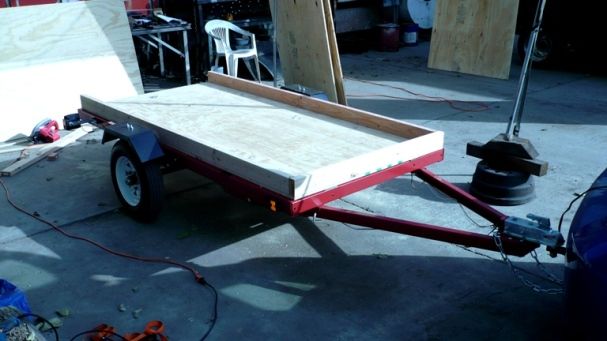 Then, I flipped the floor right side up...
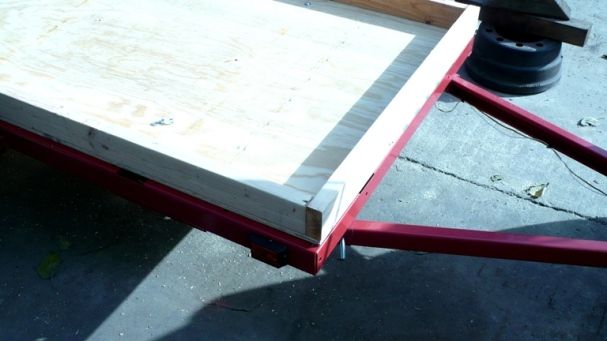 ... centered it on the trailer, leaving 5/8" on each side for the walls...
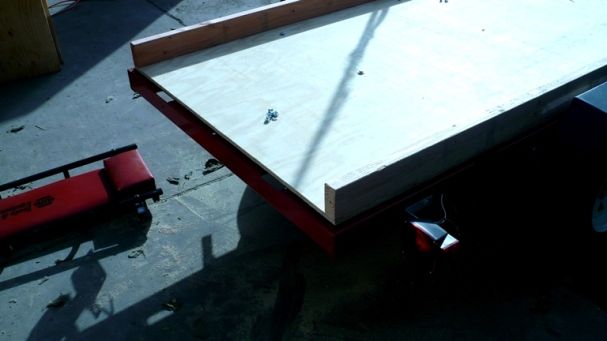 ... drilled the holes in the floor, and bolted it to the trailer. I used the pre-drilled holes that were already in the trailer, in the center of the reinforcing ribs, for nine bolts, total.
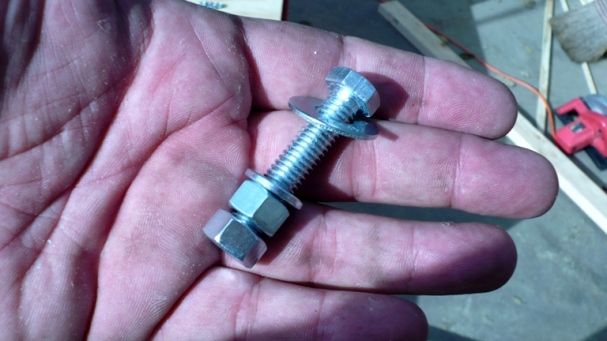 The bolts were installed head-up, and used flat washers above the floor, lockwashers under the trailer, and two nuts, locked together, for redundancy. This insures that the nuts will never, ever vibrate loose. These are 3/8" machine bolts (with 9/16" heads), 2 1/2" long.
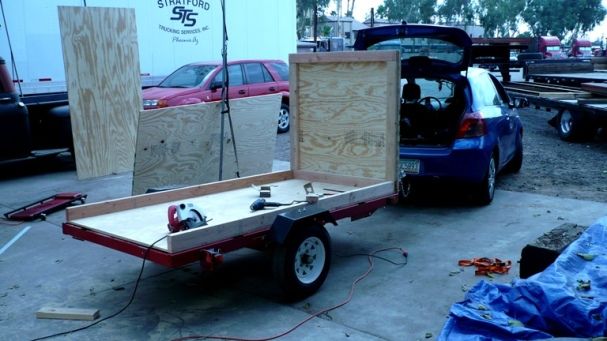 Once the floor was bolted on tight, the front wall was screwed to the floor. In retrospect... because the front wall sits in front of the trailer frame, instead of over it... I should have screwed this on first, then slid the floor forward, and bolted it to the trailer. This would have allowed the front wall to sit on the trailer deck, as I centered it up and screwed it on. In my case, I simply stacked wood scraps on the tongue to support the front wall, while I held it up with one hand, and screwed it in with the other.
It's important to point out that the front wall covers both side walls of the trailer, and the floor; the roof covers both side walls, the front wall, and the door; and, both walls butt up against the sides of the floor. The rear door is sunken in between the sides, under the roof, and butts up against the floor. This means that all of the seams are oriented in directions where they won't be naturally prone to leak, and where they're [relatively] protected from the airflow over the trailer, when the camper is in forward motion. The trailer is fastened together by Gorilla Glue, and 2" exterior [galvanized], coarse-thread deck screws. The screws provide the holding power; the glue is basically there to fill the seams (Gorilla Glue will expand to fill voids and gaps pretty readily).
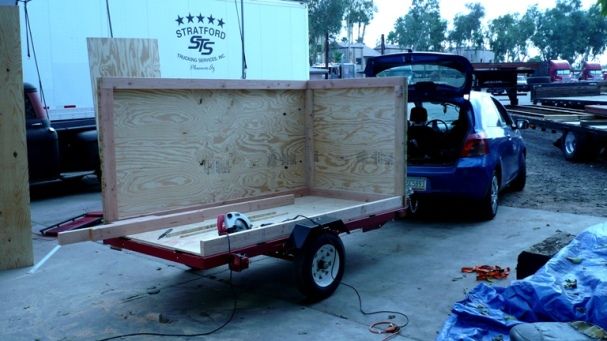 Once the front wall is on, the rest of the trailer basically falls right into place. The wall sits on the trailer frame, and is screwed first into the front wall, before screwing it to the 8' long perimeter frame.
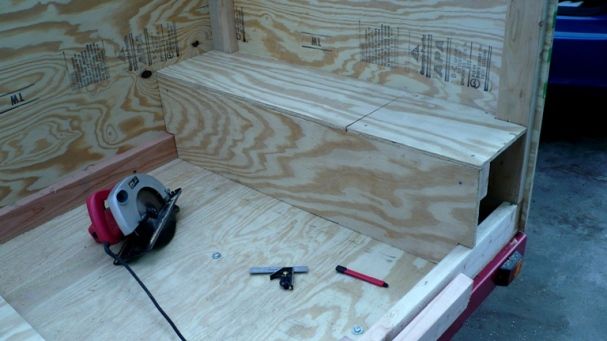 Next up came the internal headboard/storage box. It's 12" deep and 12" tall. The long part of the top simply sits into place; the short end is screwed firmly to the frame, because that's where the space heater sits; the space heater, in turn, is fastened to this short piece of fixed shelf, so it can't topple over and set me (or the camper) on fire.
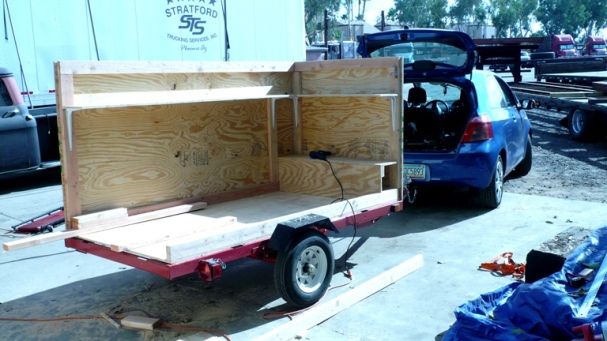 Next up, were the shelves. Note that there were originally two shelves; one running down the length of the drivers' side, and one across the front, directly above (and, the same size of) the headboard. As it turns out, the space heater was so hot that the heat rose straight up, and made the front shelf remarkably hot as well. Also, I kept hitting my head on that damned shelf, working in the trailer. Thus, the front shelf came out. As did the ugly, white steel brackets holding it up.
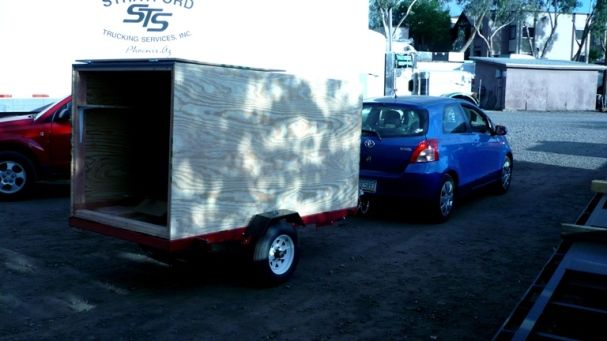 The finished shell. The sides, and the roof, are full 4' x 8' sheets, while the rear door is 46 3/4" wide by 48" tall. The top-hinging door was intended to double as a canopy, when opened.
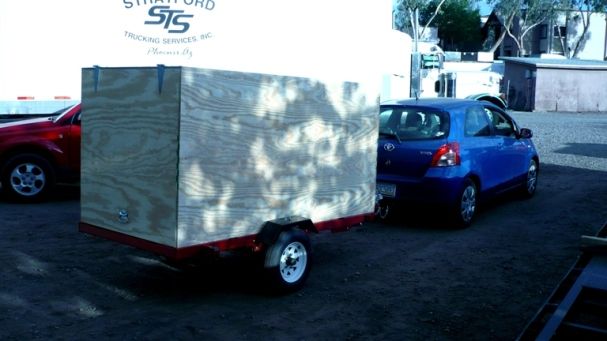 And with the rear door closed. Finished...! For the moment, at least...
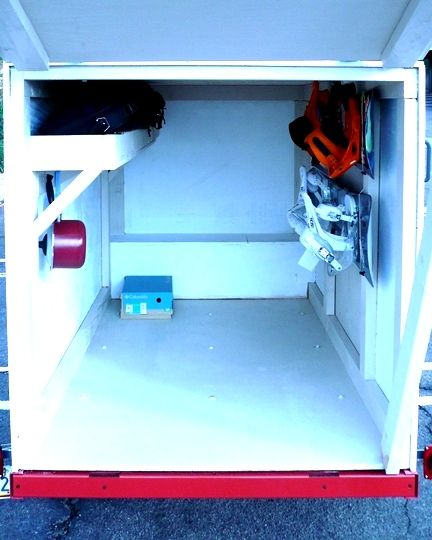 This is the inside, after revisions and paint. Note that the front shelf is gone, and the side shelf is now held up with 2 x 4's, cut at 45-degree angles. The side shelf also has a perimeter "fence" around it, using more 2 x 4's, to keep items from bouncing off while the camper is in transit. The snowboards hang on the passenger side by eye hooks and bungee cords. There are also L-hooks under the shelf for hanging things like battery-powered mini-lanterns (for light), as well as pots and pans (as shown), or whatever else you might want to hang.
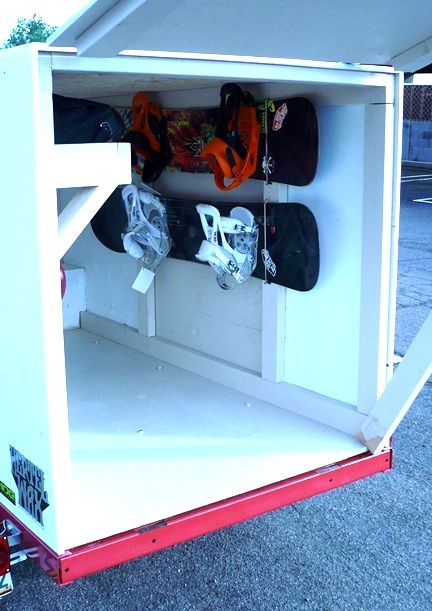 A different view of the inside, showing how the eye hooks (for the snowboards) are screwed into stout 2 x 4's; the outside snowboard hangars screw into the same 2 x 4's, from the other side.
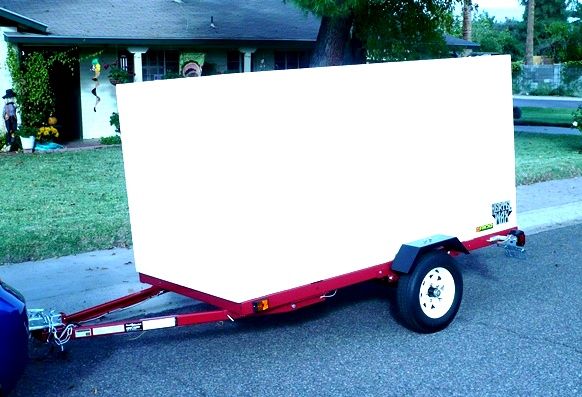 The drivers' side of the finished, and painted, camper.
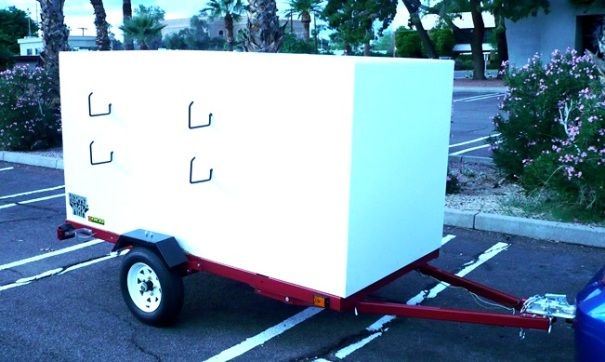 And, the passenger side. Those stout hangers are for hanging wet and/or snow-and-ice caked snowboards out to dry, before putting them inside the camper for the night. If they don't warm up and drip-dry, they can simply be locked to the outside of the camper overnight.
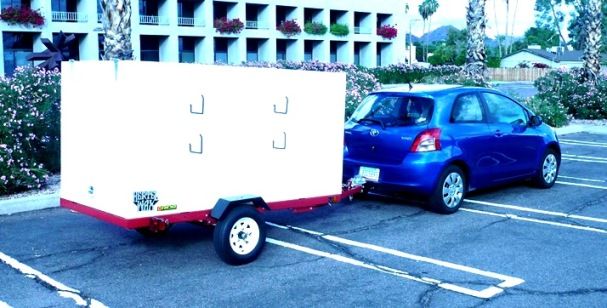 The rear view, with the door closed...
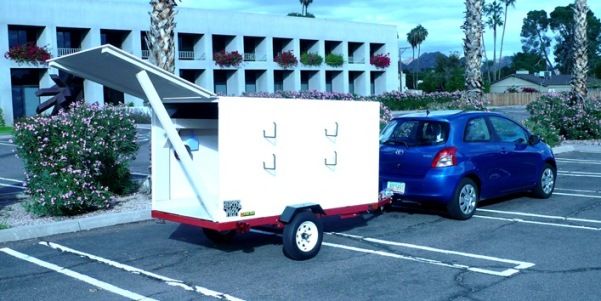 ... and with the door open. I've recently replaced the single 2 x 4 with two shorter pieces of 5/8" plywood scraps; they're lighter, slimmer, and easier to handle. The door now sits in line with the roof when open, too.
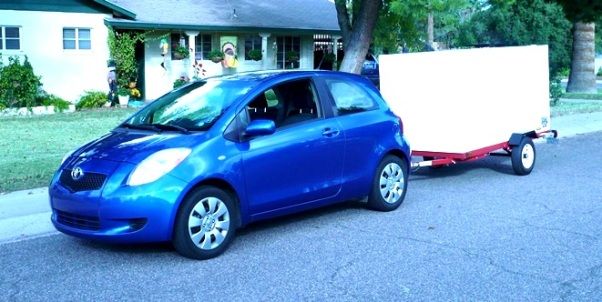 And, the frontal view. Which you've seen so much of, already...

 Here's a short outline of the costs that I've incurred so far, in building my camper project. While I'm counting these off, you might want to keep in mind that the base price of most of the smallest micro-campers out there are easily within the $5000 to $15000 range:
The first expense was the hitch for the Yaris, which included the hitch itself, plus installation, at U-Haul. Approximate cost: $310.00.
Next up, was the trailer kit. This particular trailer is the "heavy duty" Haul Master trailer from Harbor Freight Tools. If I'm not mistaken, I got mine on sale for about $386, after taxes. Registering it was another $50. That's $746, so far.
The lumber was about $380; paint (and supplies) was $65; I made two purchases for hardware (screws, hinges, locks, chain, wall hangars, hooks, et cetera) of $90 and $65, respectively. With these purchases, we're up to $1346. I bought all of this at Home Depot.
The mattress was $150 (I bought this gently used- twice- from a friend), and the bedding was $50 (including a "bed in a bag" kit at Wal-Mart, plus pillows). These bring the totals to $1546.
Then, I bought a "buddy heater" ($70), and a propane stovetop (another $70). This brings us up to $1686. I already owned a portable grill, and a ton of propane tanks- those will now live in the camper, as well.
I also bought a grease gun and grease (to re-pack and re-grease the wheel bearings), and some extra lenses for the rear taillights (one came broken in the trailer kit, and having extras never hurts). I also bought some wire, connectors, and tools to do the wiring on the trailer. This was all about $50, which brings the total to $1736.
I also bought some nifty, aftermarket "jeep" style fenders for $70. I'll have to spend about $25 on paint and primer. This will bring the total to $1831.
Then, I have a few more accessories that I'd like to buy through the next couple of weeks. A colder-weather sleeping bag ($180 at Dick's Sporting Goods, which will endure temperatures of -20 degrees F.), an electric space heater ($40), a small, gas-powered generator ($130), and a roof vent/skylight ($50), which will bring my budget up to $2231. The electric space heater and generator are pretty redundant, given that I already have a propane buddy heater, and extreme-weather sleeping bags... but then, when you go into the wilderness for long stretches of time, in extreme weather conditions... redundancy isn't such a bad idea. In fact, it can be a lifesaver.
I'm building the cargo box/air deflector for an additional $110, which brings me to $2341.
Lastly, there will be some additional paint for the final paint scheme and trim ($50), which will bring the total outlay for the entire project to $2391.
I suppose the other "costs" that I should mention, were the time outlays. Building the trailer took about four hours; wiring it took another two (or so). Building the camper box took about 12 hours total (for the initial build), plus maybe another 12 hours in detail work and revisions. So, the complete build was probably in the vicinity of 30 hours, all-inclusive. To be fair, I didn't exactly hurry. Actually, I worked at a pretty leisurely pace. I was, after all, building a leisure vehicle. As such, it just felt innately wrong to hurry, while building it.
But what I got out of it is a great-looking little camper that suits my needs exactly. It's warm and comfortable, even in the most extreme of cold-weather climates (remember, the sleeping bag alone will protect me down to -20 degrees F... even before firing up the buddy heater and/or the electric heater and generator combo). It holds a ton of gear and cargo (a typical load being two fully set up snowboards, three backpacks, a portable grill, a portable stove, propane tanks, foodstuffs, a clothing bag, a toolbox, books, and all with room to spare). Plus, it frees up all of the cargo space inside the Yaris, which means that:
- I can bring even more stuff (as needed), or
- The car is suddenly a lot more roomy inside, with all of that gear cleared out, and put smartly into the camper.
It features a "real" bed, complete with bedding.
I can camp literally anywhere I choose. I'm not at all restricted to campgrounds. I can sleep in rest areas, roadside lookouts, store parking lots... anywhere at all, really, the only limits being my imagination, and my comfort level. Anywhere that I get tired, that's relatively quiet, and where I feel reasonably secure- I can sleep. And it sets up in [literally] less time then it takes me to open up the rear door. It is the definition, of "turn-key ready".
And...
Best of all, it weighs less than 1000 lbs, and my car still gets nearly 30 mpg. while pulling the trailer.
The simple, efficient economy of it means that I now have a vast amount of newfound freedom. Anytime I want to leave the city, ditch the rat race, escape the social [dis]order, and go explore the world around me for long stretches of time... all I need to do is hook the camper up, put a little gas in the car, grab a few cans of soup and beans, and hit the road. The camper might have cost me a little under $2500. But the freedom to explore the world around me in relative security, comfort, and convenience on a threadbare budget is priceless.

 After taking the camper out for it's maiden voyage last weekend, I decided that it was time to go back to the drawing board, and make some design revisions:
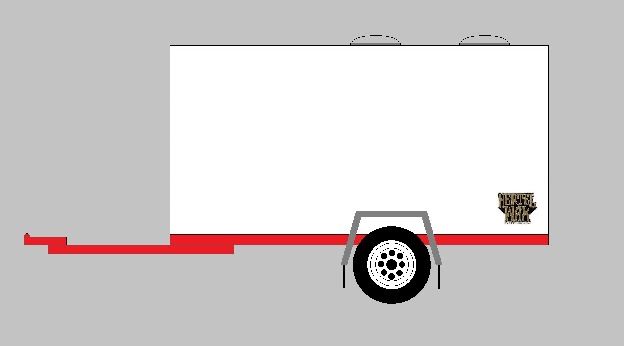 The problem with the current micro camper design, is that the front end is simply too blunt, too boxy. With this design, the Yaris averaged only 26.12 mpg over my 340 mile trip last weekend. Which isn't particularly "bad", given that a great many campers (and their towing units) fare far worse. But, I thought that I could do better.
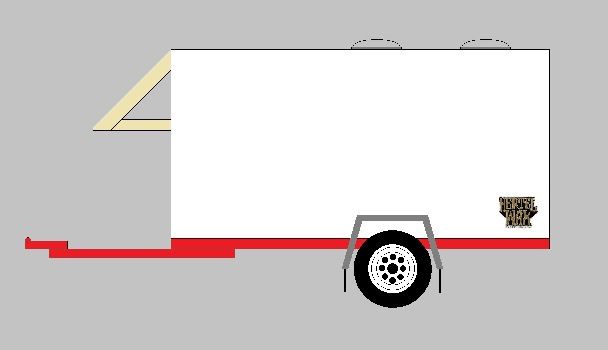 So, I added a temporary "air deflector" to the micro camper last weekend, which improved fuel economy to 29.45 mpg. I used scrap wood (and paint- thus, the tan hue of the air deflector) that I had left over from the camper build, so building the air deflector was sort of like like installing free money onto the camper shell...!
Now, the only problem is that the fix is, well... ugly. Fugly, actually. If I can be blunt. Again, no pun intended.
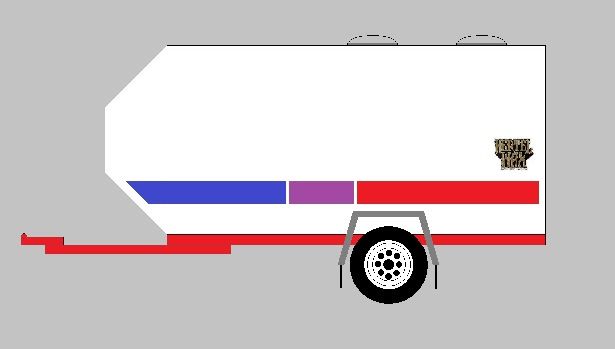 The permanent fix is going to be an enclosed air deflector box, that can double as (much needed) storage space. The cost...? About $110.00, broken down as such:
- (2) sheets of 5/8" BC plywood + $33 each, for a total of $66.
- (2) 2x4's, at about $3 each, for a total of $6. And,
- Another gallon of white exterior latex, which will cost about $38.
Compare that to the black "job box" that I was going to buy for the camper, which would have been about $130 at Home Depot. The takeaway is that I'll save $20, while improving my fuel efficiency by about 13%.
 This schematic shows how the interior box design will look. A hinge-up door will allow snow and rain to fall off of the top of the box (or to be blown away as the car is moving, given that the flip-up door will also double as the air deflector), while allowing about six cubic feet of usable storage space inside.
Next week: My first winter camping trip...! I can't wait...!


